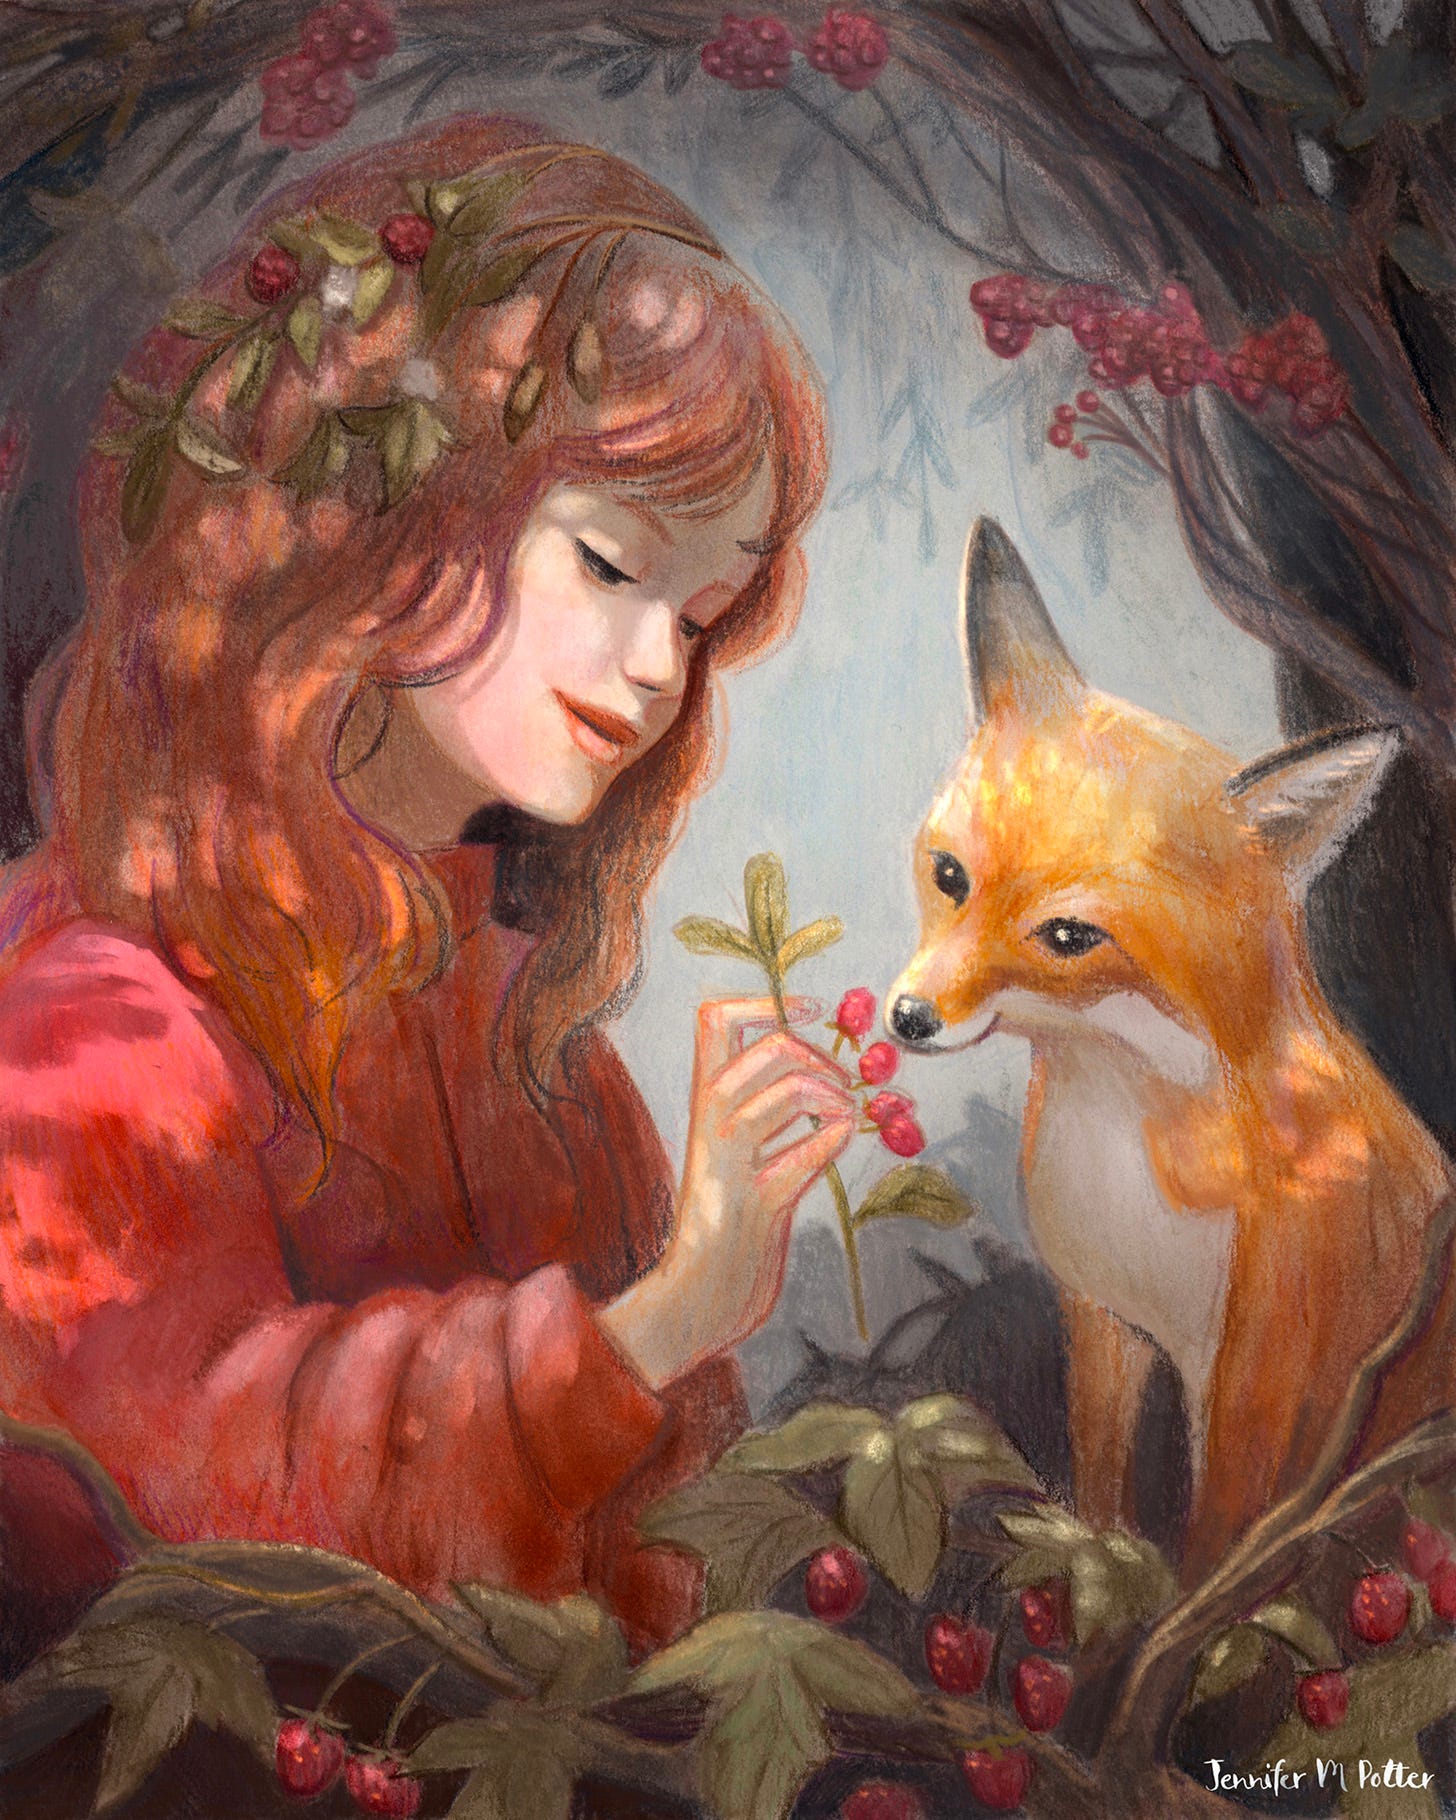
Tutorial: A New Way to Light your Art in Procreate
And it works with traditional art, too!
UPDATE: Somehow I got through this whole tutorial without sharing the real reason for using this method, so I’m sharing it here. This technique maintains your original texture in Procreate far better than the more common method of overpainting your light and shadows with basic colors and blend modes. So if your work is highly textured, or if any part of your process uses traditional materials, this method is worth taking for a spin!
A New Way to Light your Art in Procreate
I use a few different methods to add light and shadow to my art. It all depends on my mood and the look I’m trying to achieve. I’ll share all of them in time, but I don’t think I’ve ever seen anyone share this particular method, which makes it just a little special.
It’s based on a technique I learned from the founders of Tonko House. The original method uses Photoshop adjustment layers, and this particular feature isn’t available in Procreate.
But that’s okay, we can mimic it!
Step 1
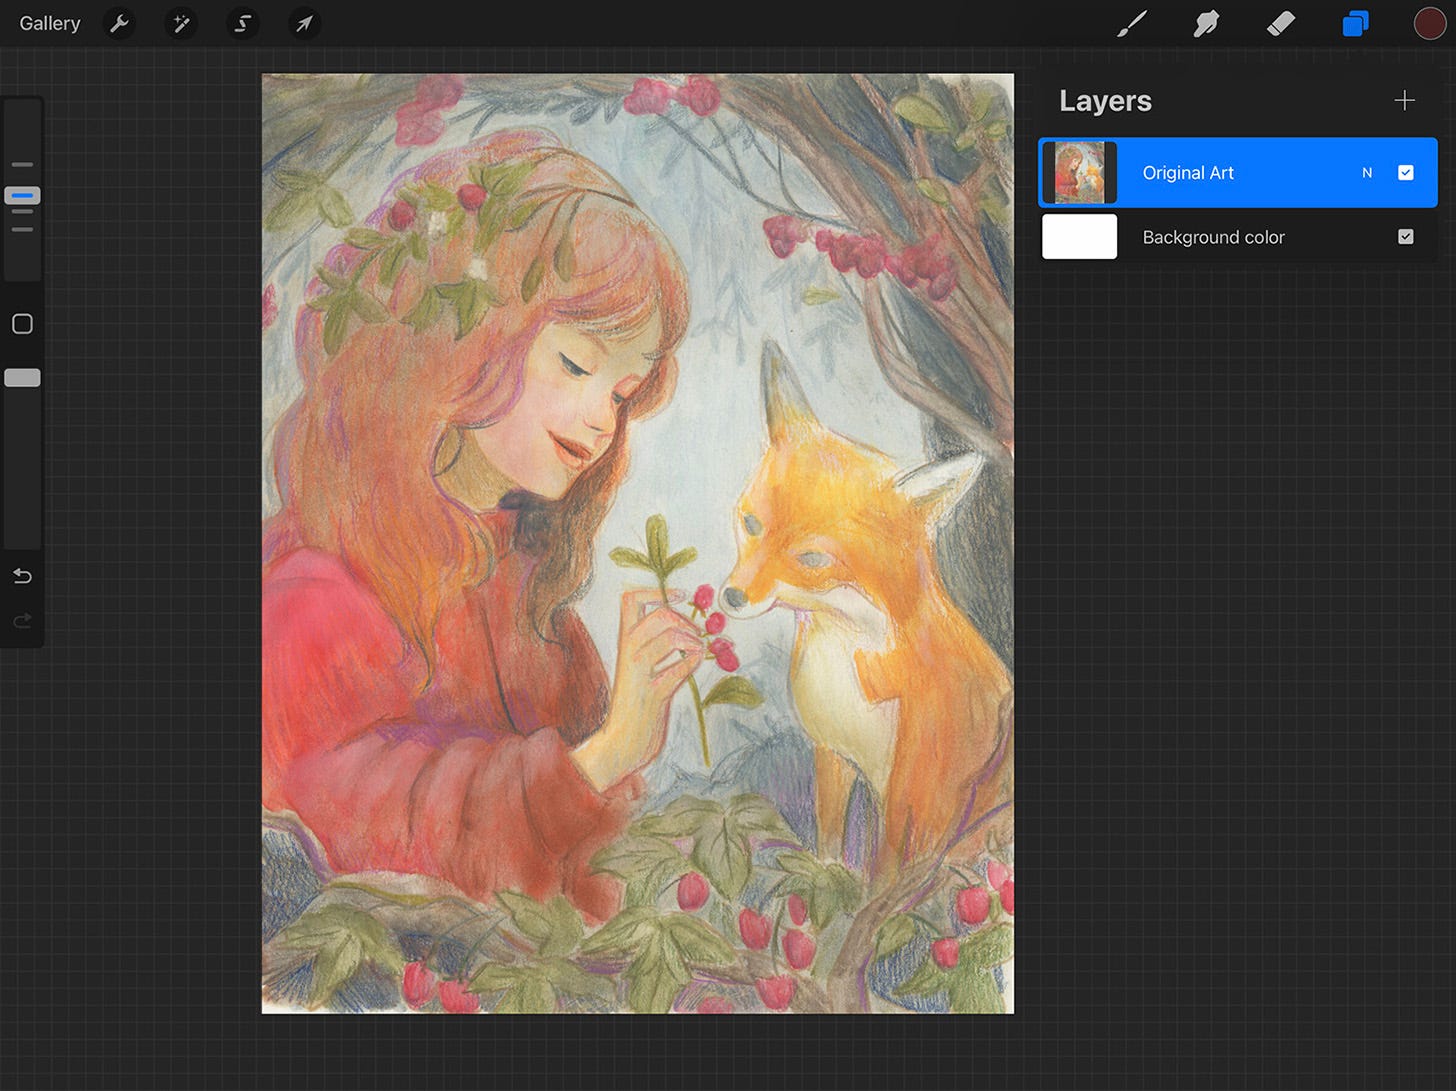
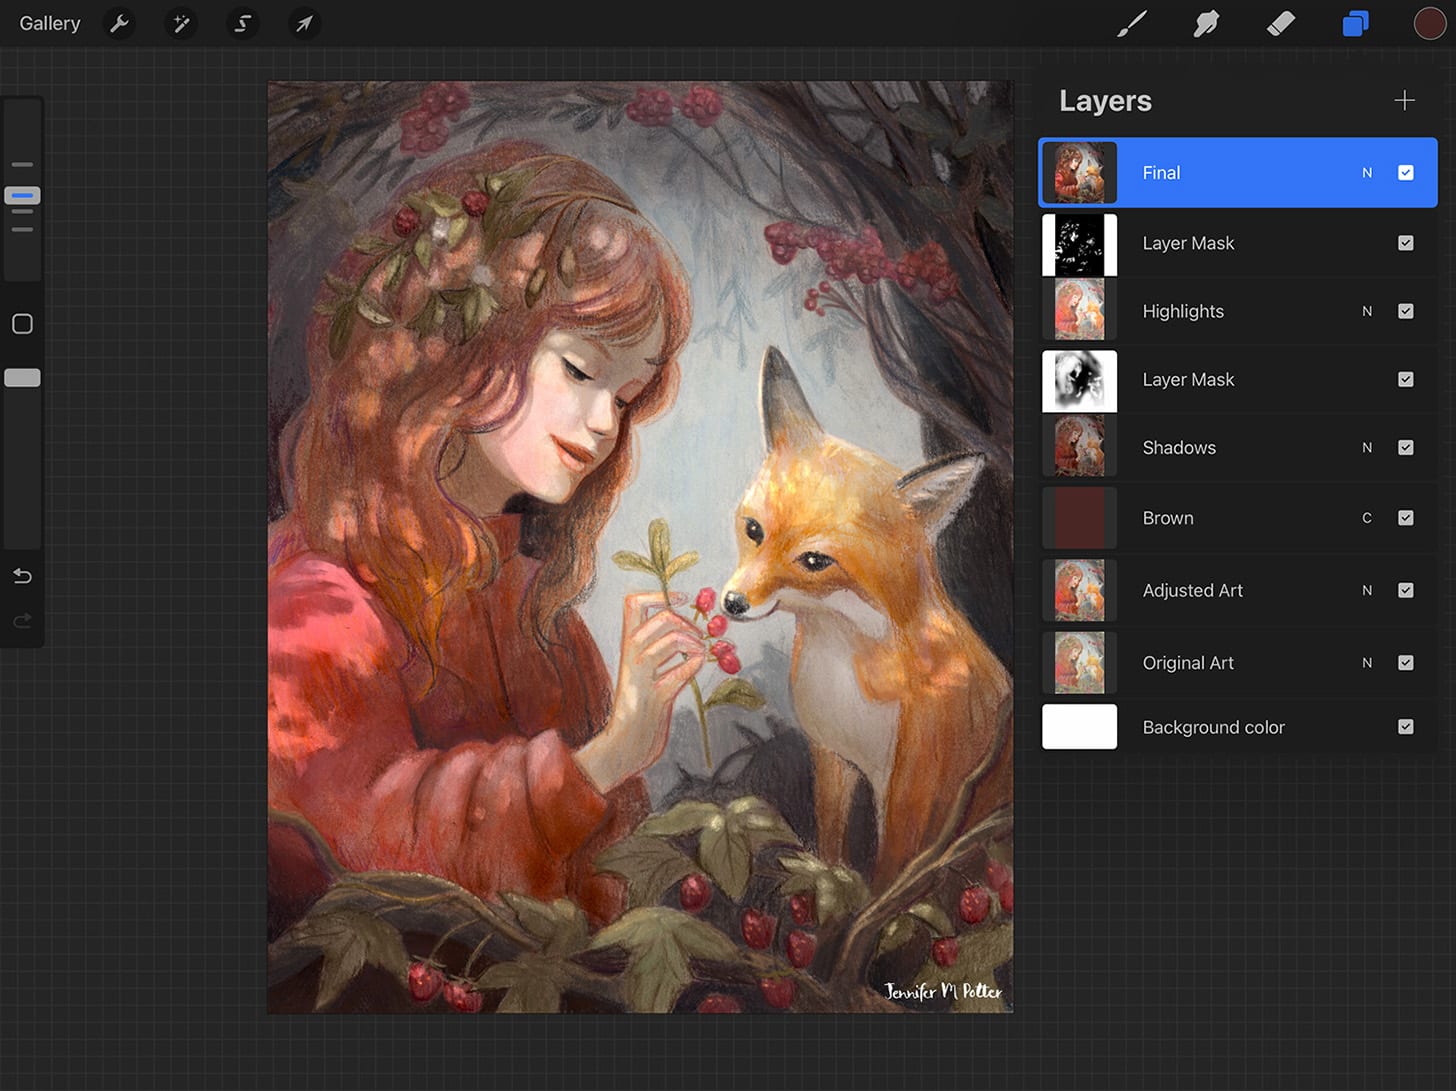
Open the art you want to light in Procreate. I made this piece with Caran D’Ache Supracolor watercolor pencils and then scanned it in.
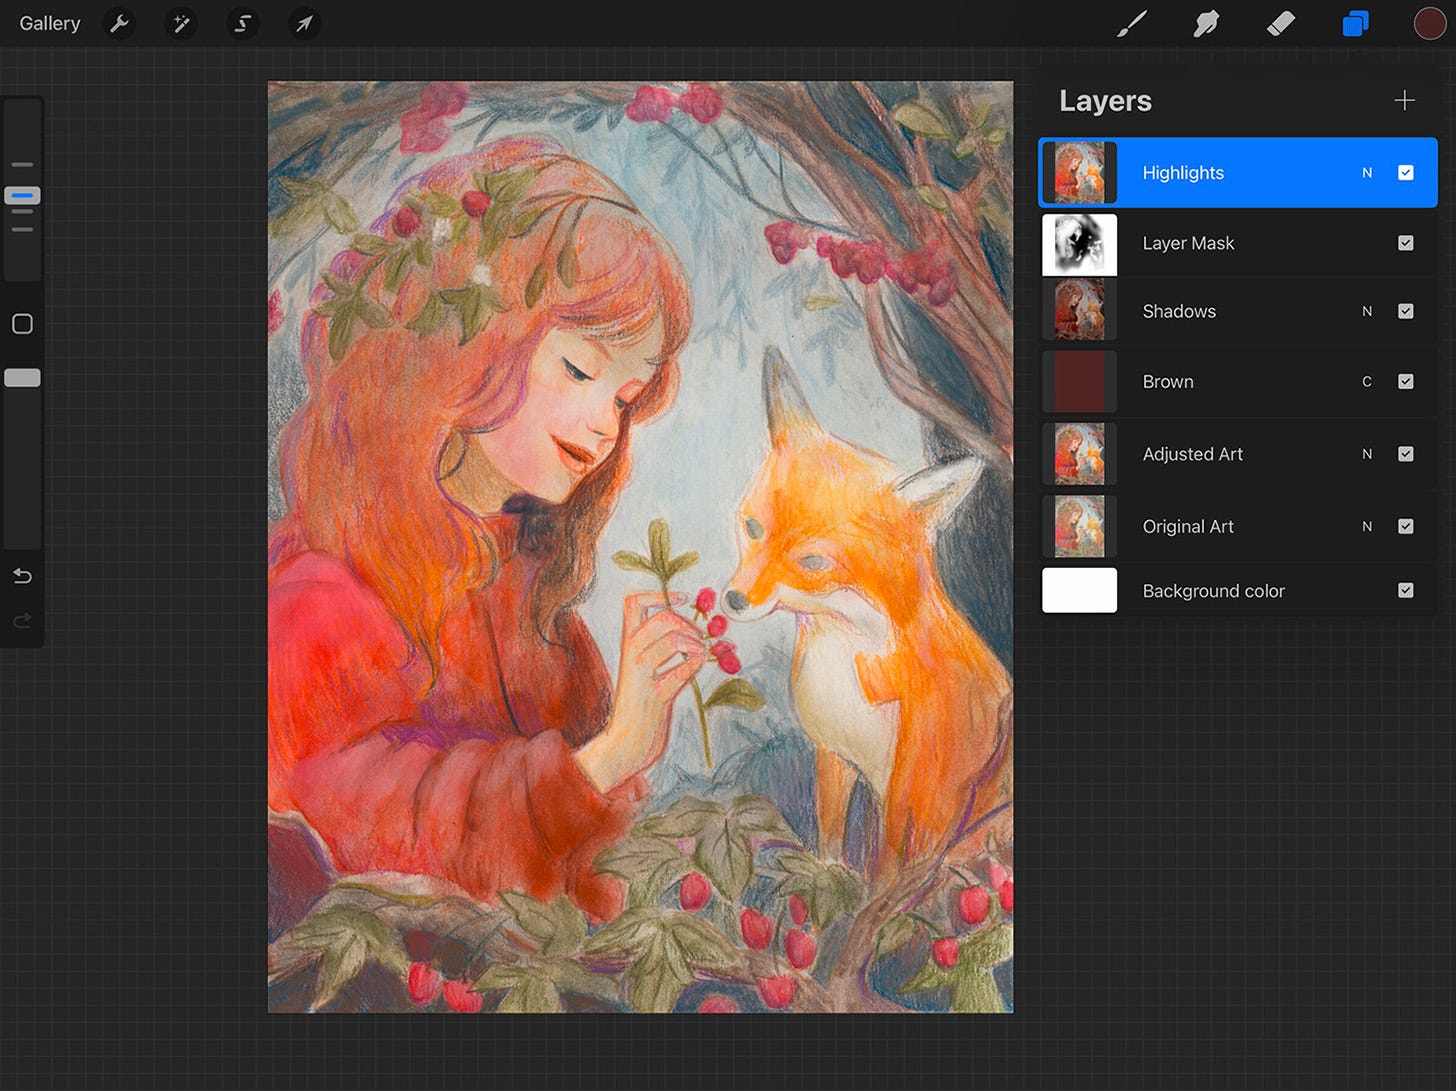
Real talk: I basically never name my layers unless I’m sending a PSD to a client. I often use dozens if not hundreds of layers, so I prefer to manage things with clipping masks and folders. But for this tutorial I’m going to recommend renaming your layers just to keep things nice and clear.
We’ll start by naming the first layer Original Art.
Step 2 (optional)
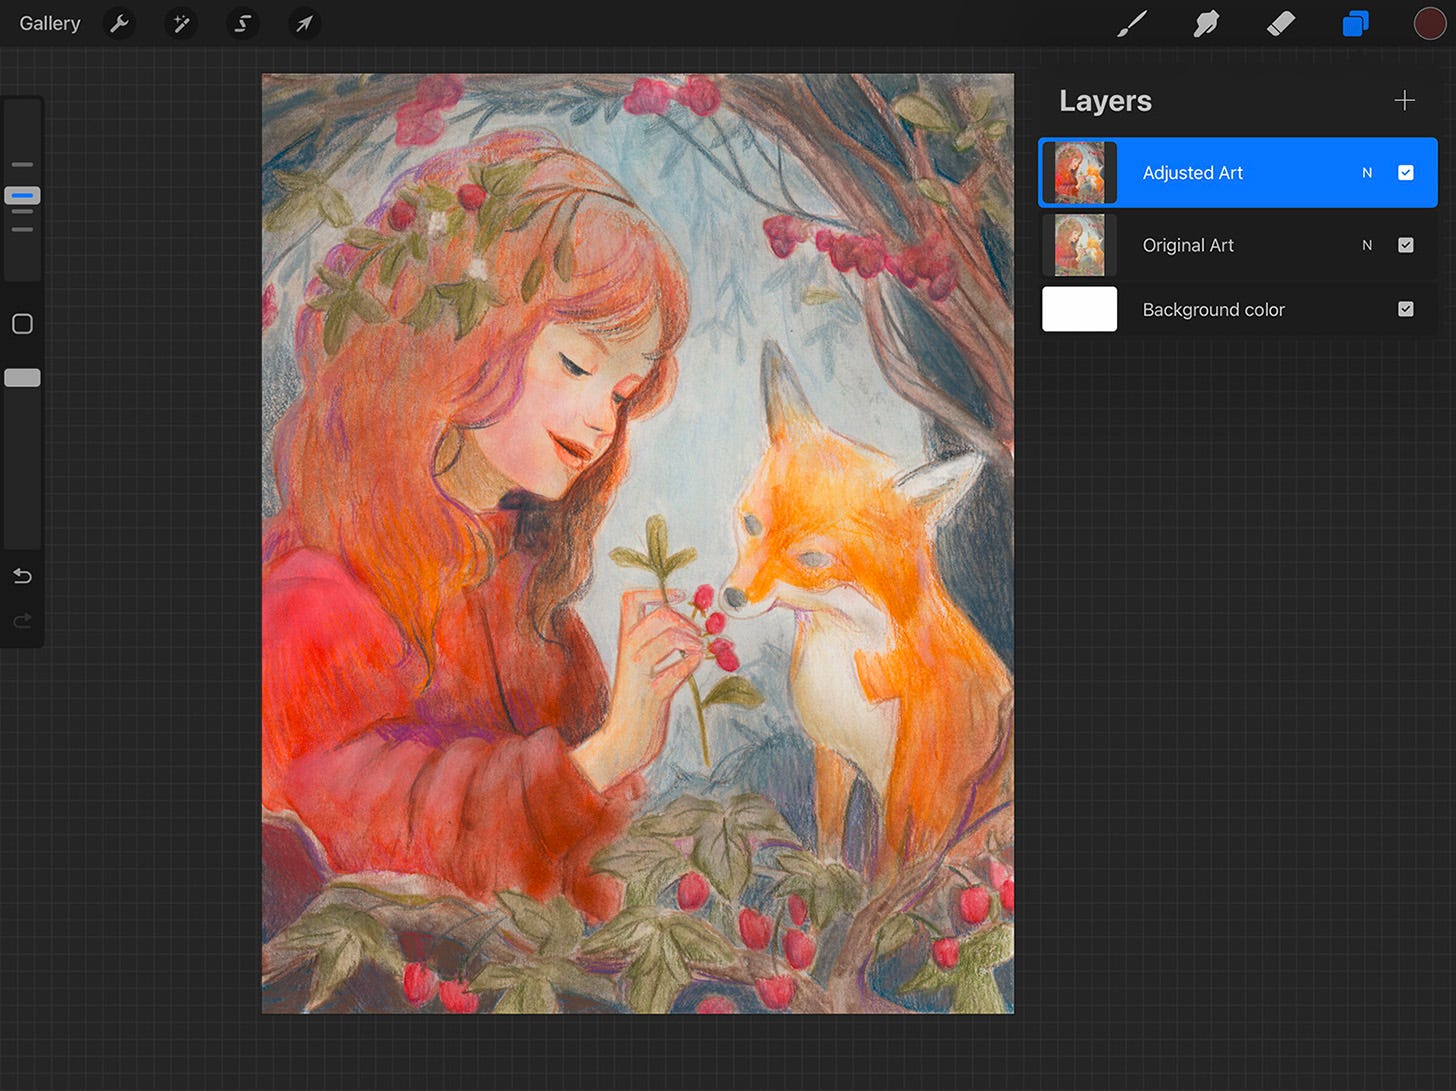
Duplicate the Original Art layer and make any adjustments you want. This is mostly for those working traditionally, but I find it helpful to get the image as close to finished as possible before I get to the lighting. I’ll often make adjustments before and after doing the lighting, but there are pros and cons to both.
Rename this new layer Adjusted Art.
Step 3
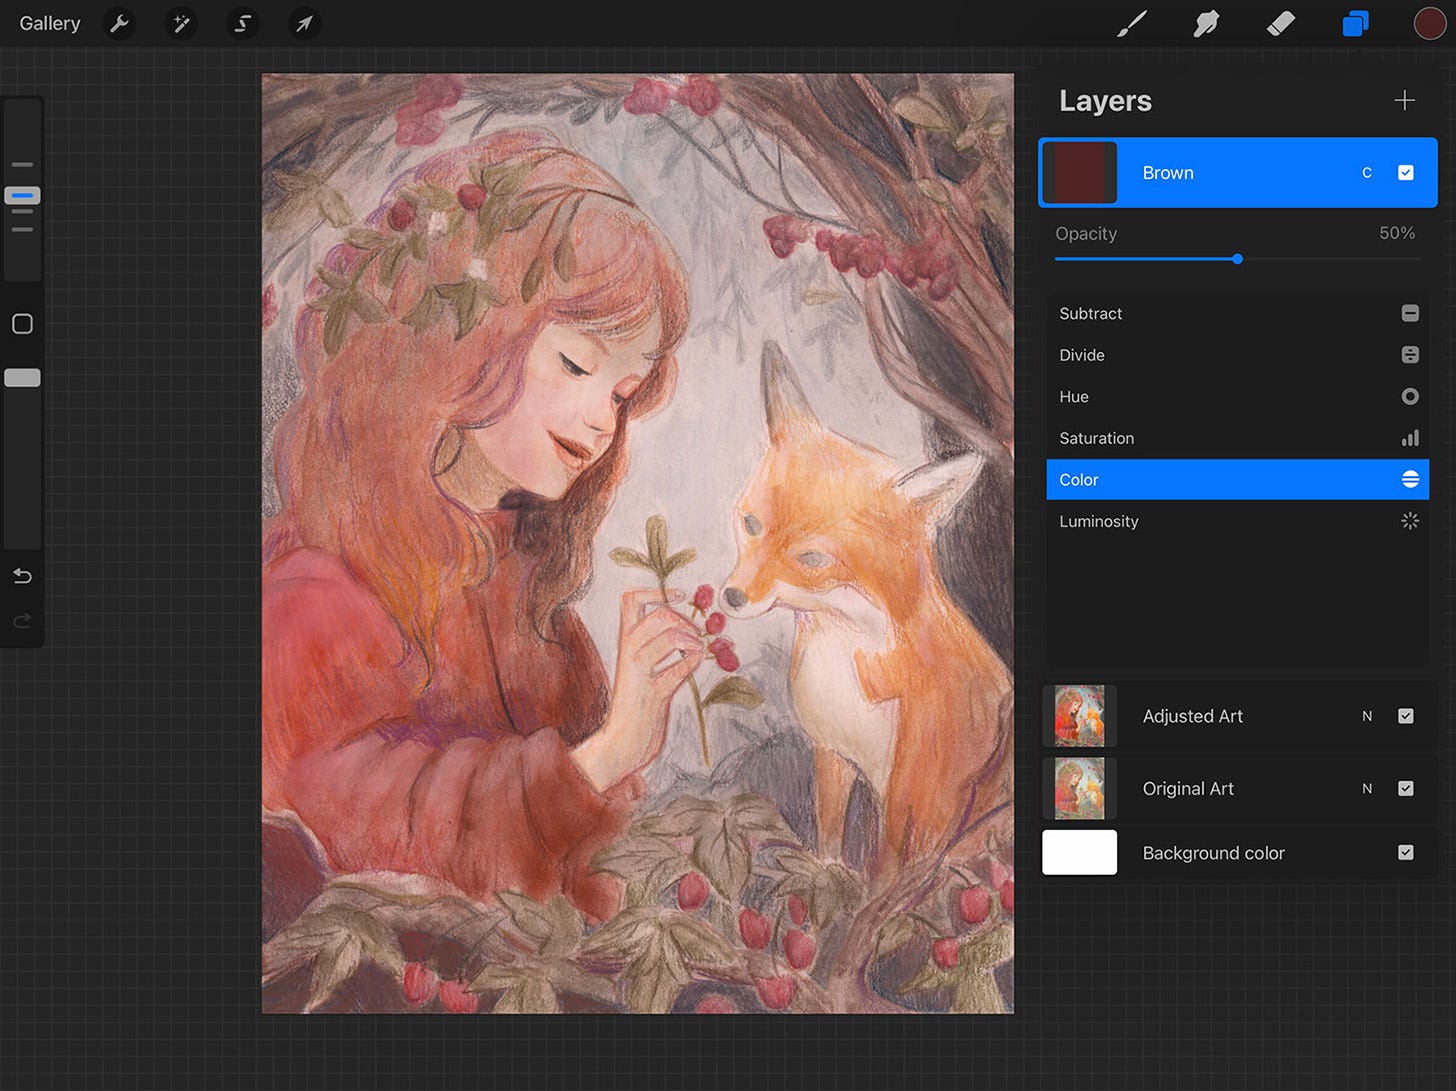
Make a new layer and fill it with the shadow color of your choice. As a general rule, if you want warm light (think sunsets, campfires, and indoor lighting), you’ll want a cool shadow color and vice versa (moonlight, blue skies).
Set this new layer’s blend mode to Color and then adjust the opacity to 50%.
For this piece I wanted cool light and warm shadows so I chose brown. The value of the color doesn’t matter since the value will come from the art.
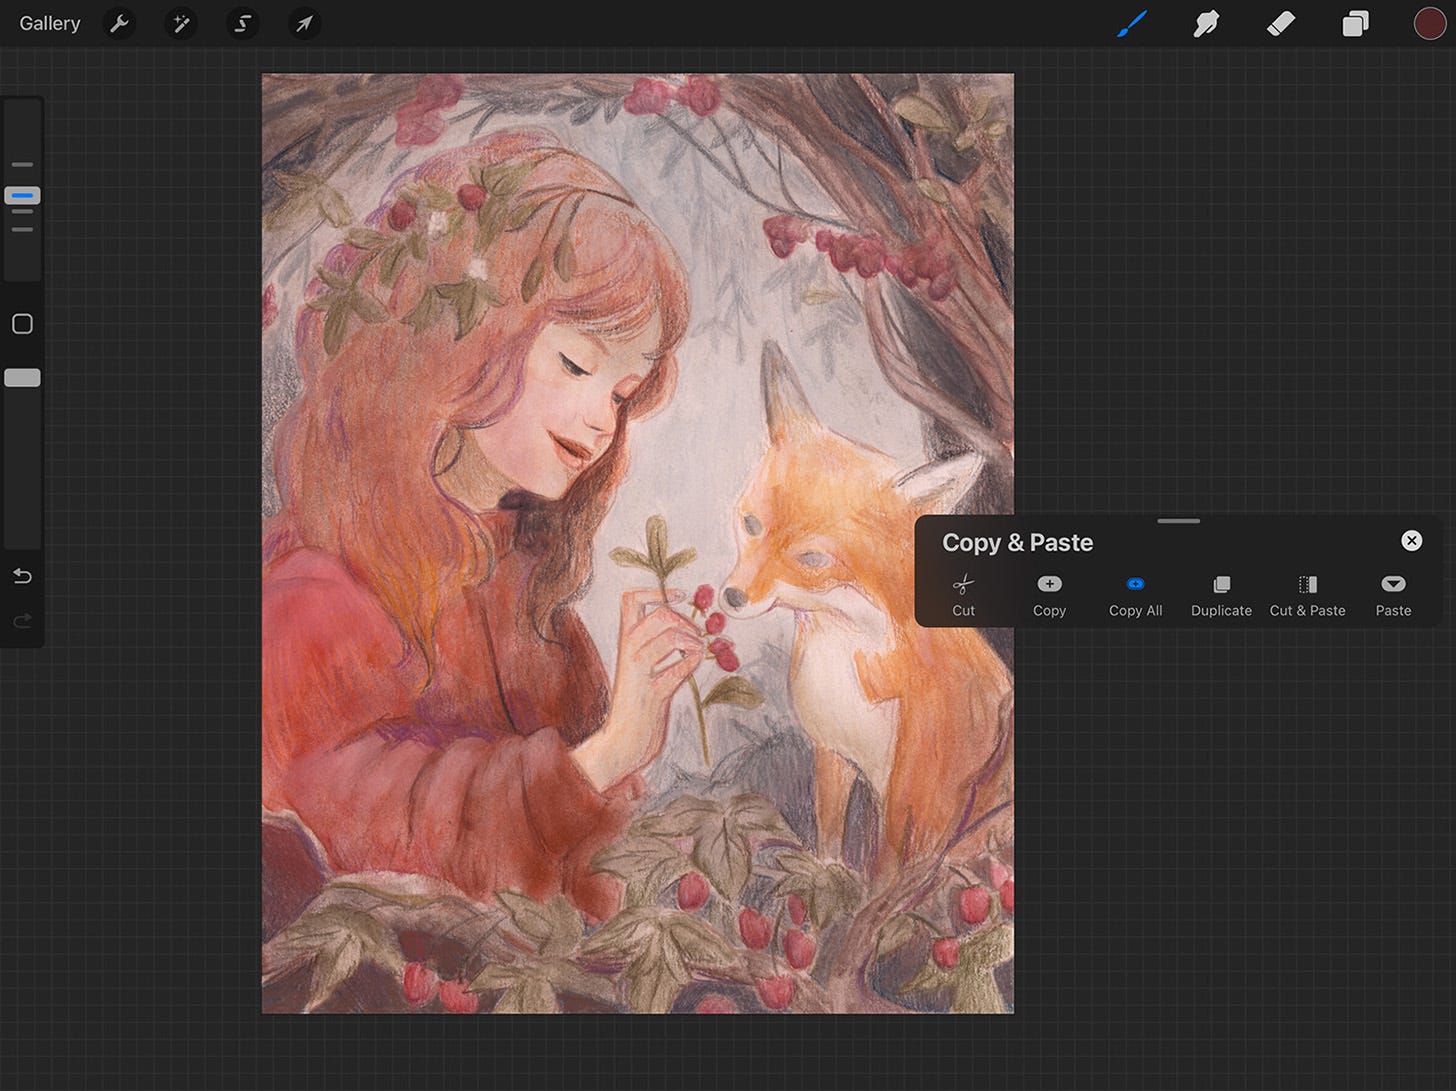
Next, make a new layer by using the Copy All and Paste features. Your gestures may vary depending on your settings, but by default you can access the Copy & Paste menu by swiping down with three fingers.
Tip: Swipe to the side of your canvas so you don’t accidentally make any marks.
Alternatively you can achieve the same thing if you group your layers, duplicate the group, and then flatten the group.
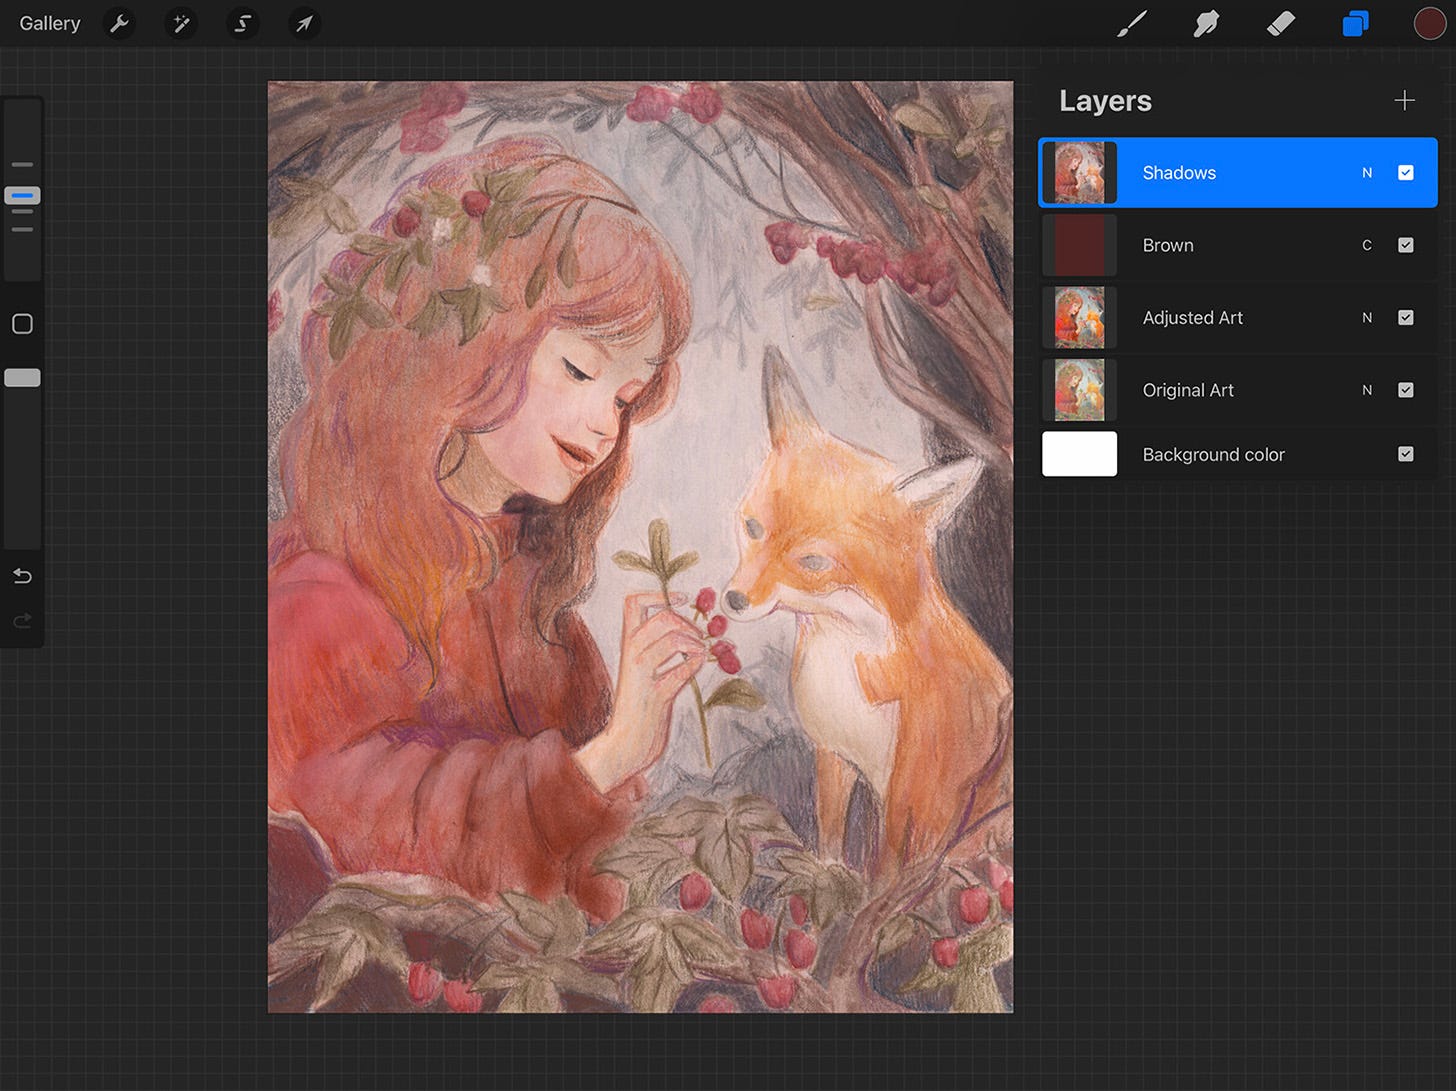
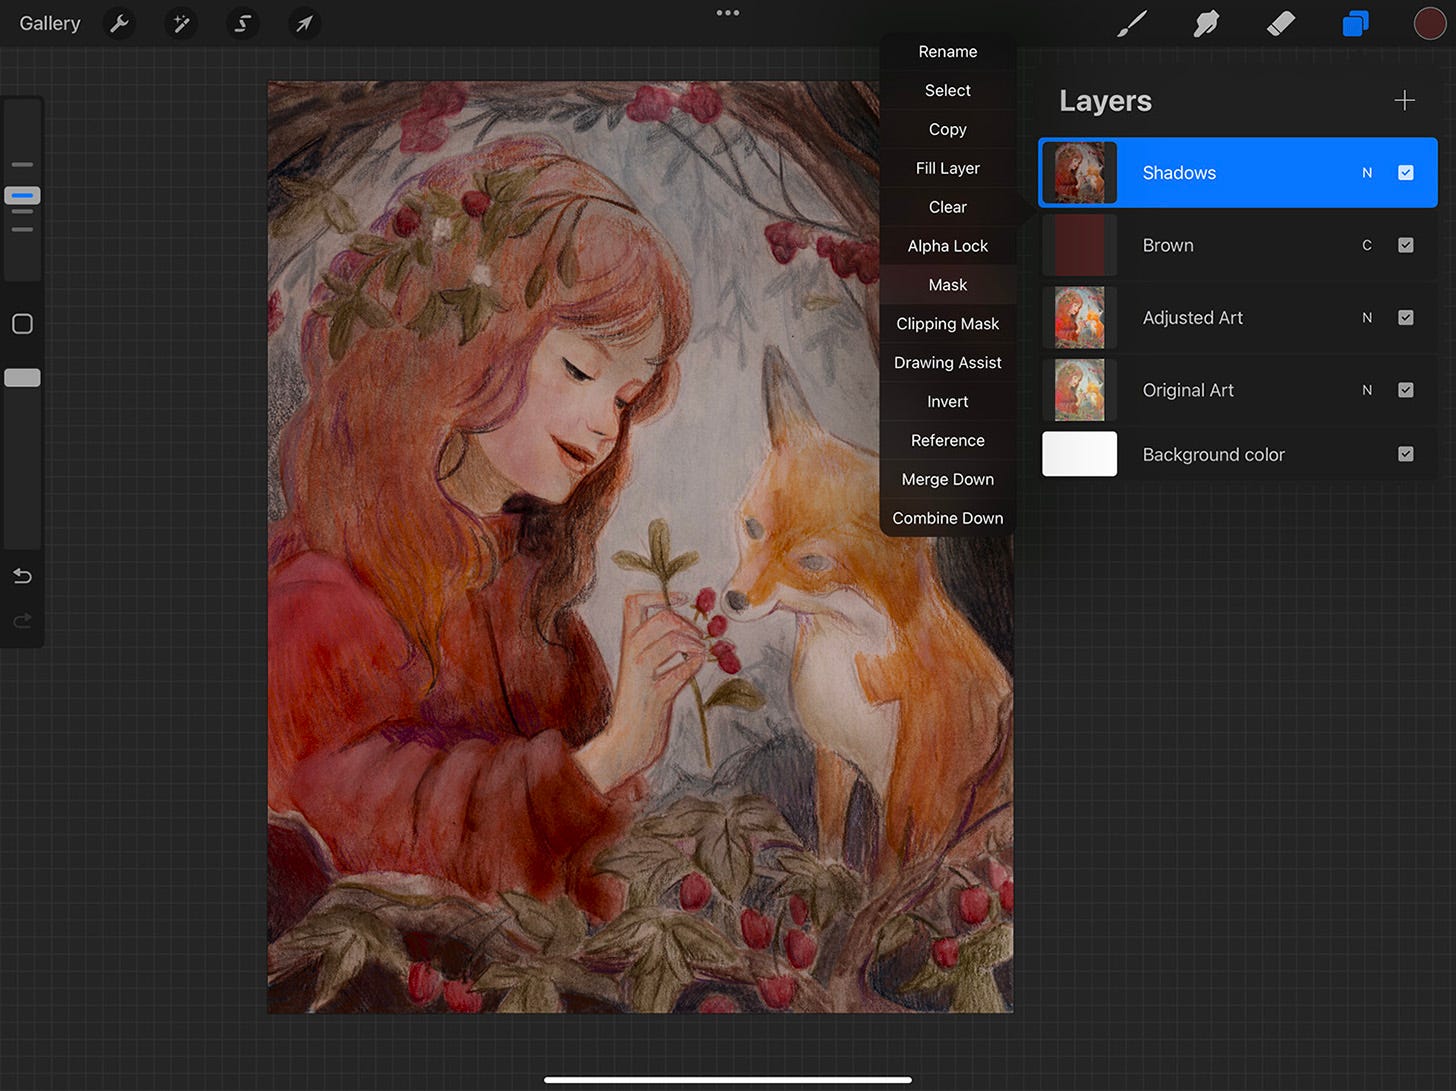
Rename this new layer Shadows.
Step 4
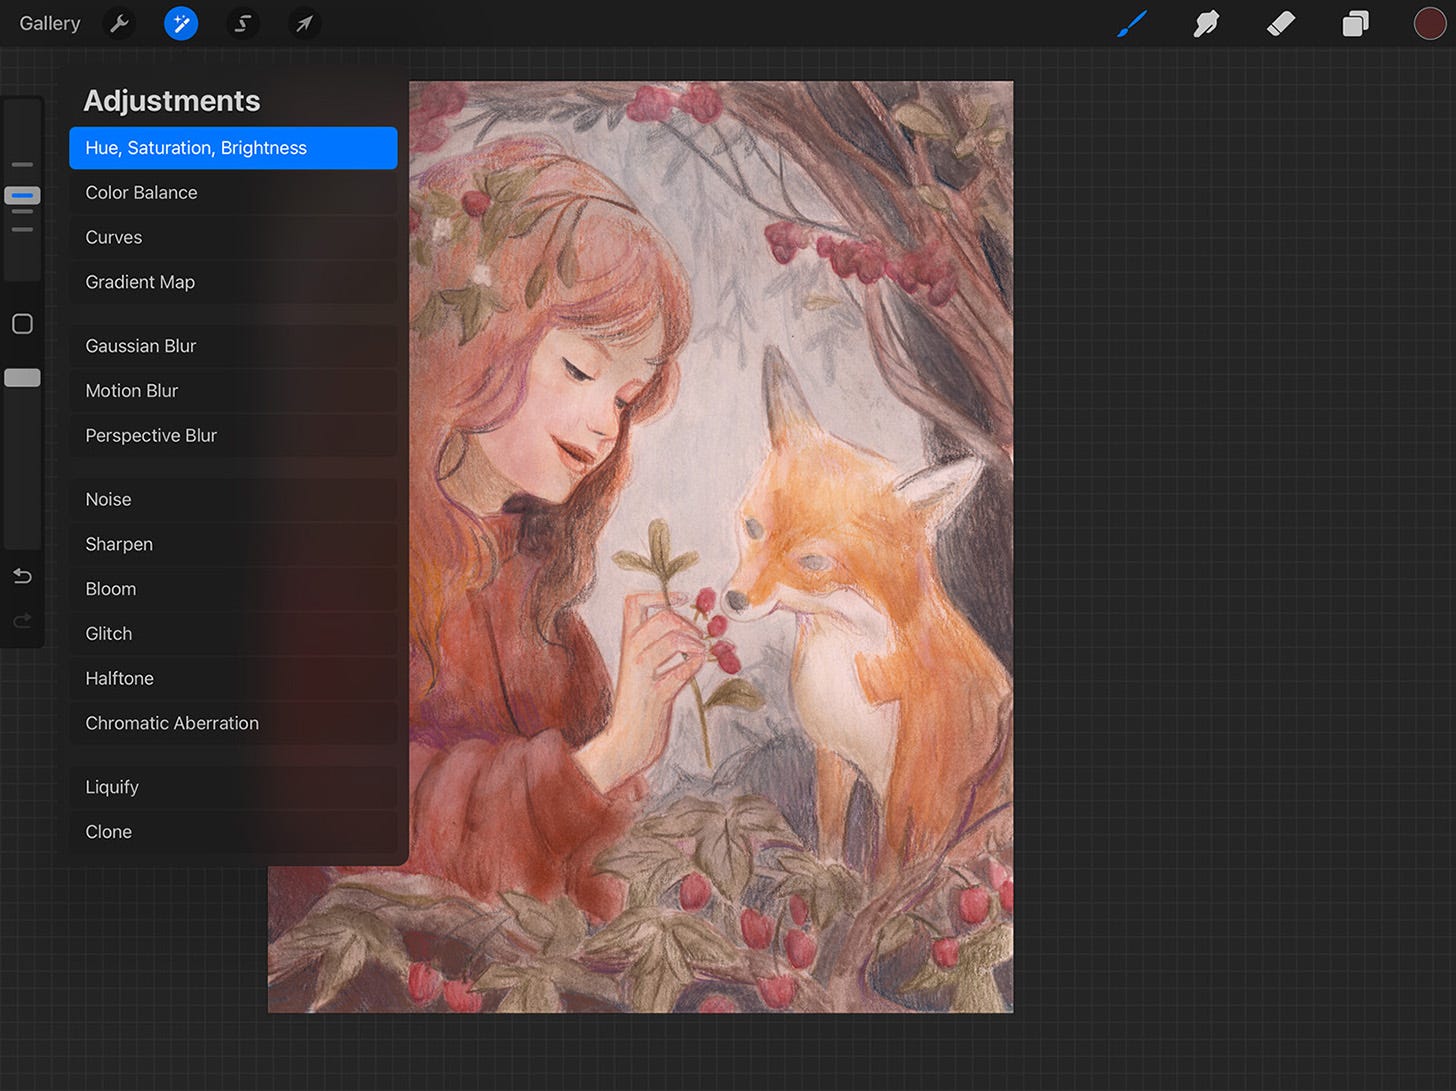
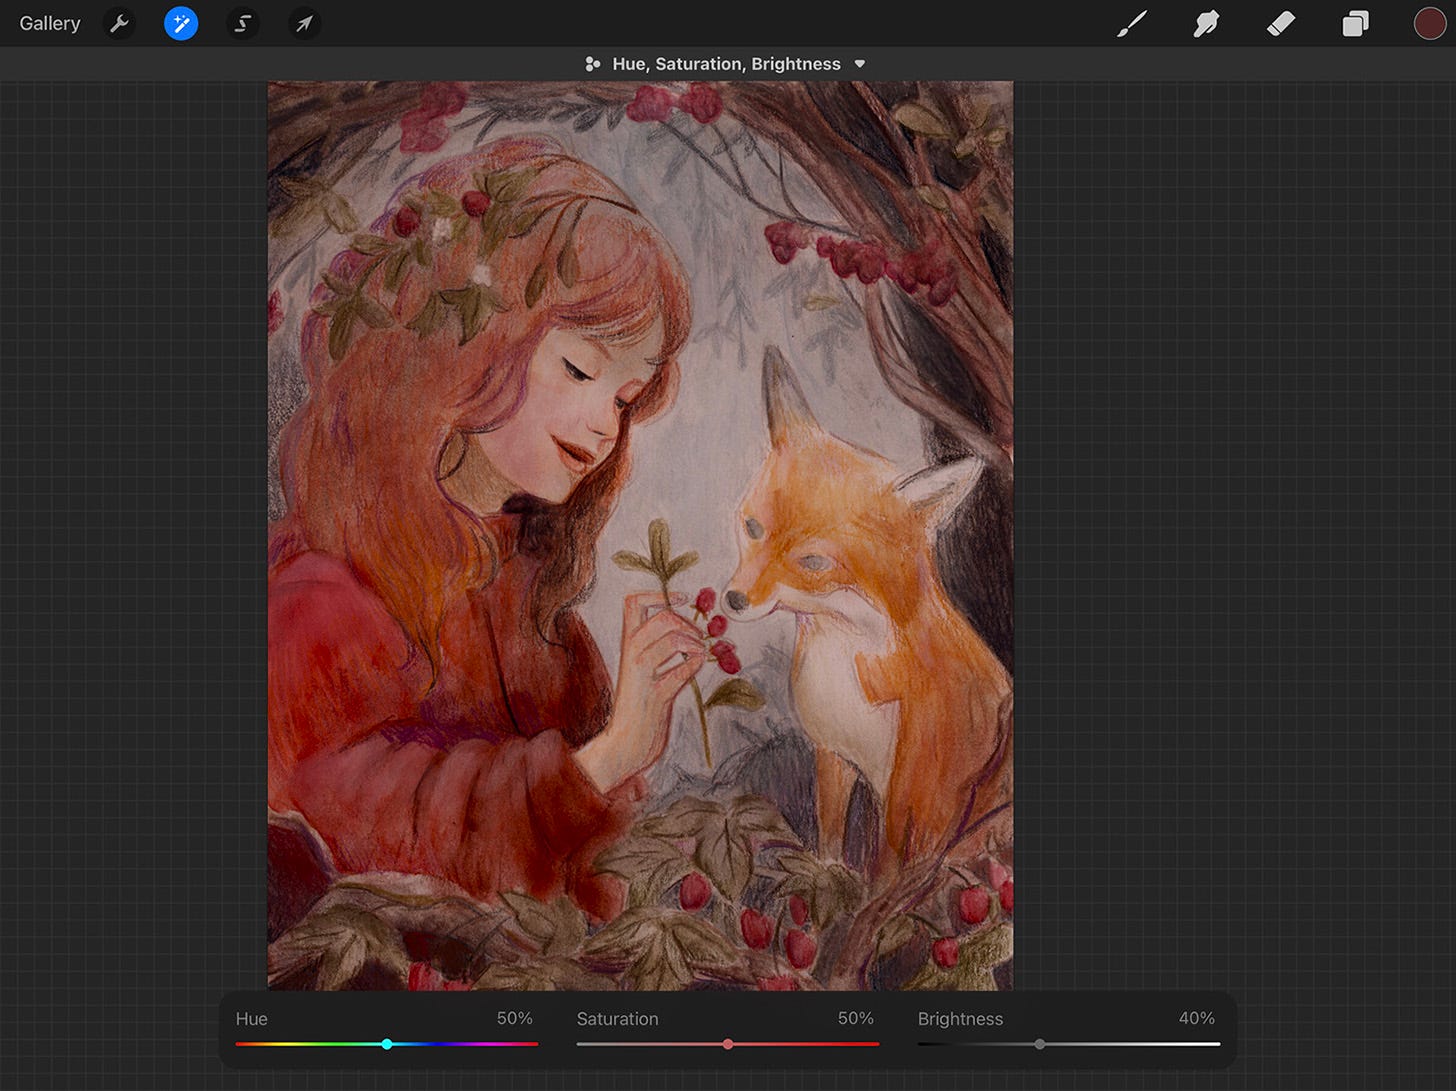
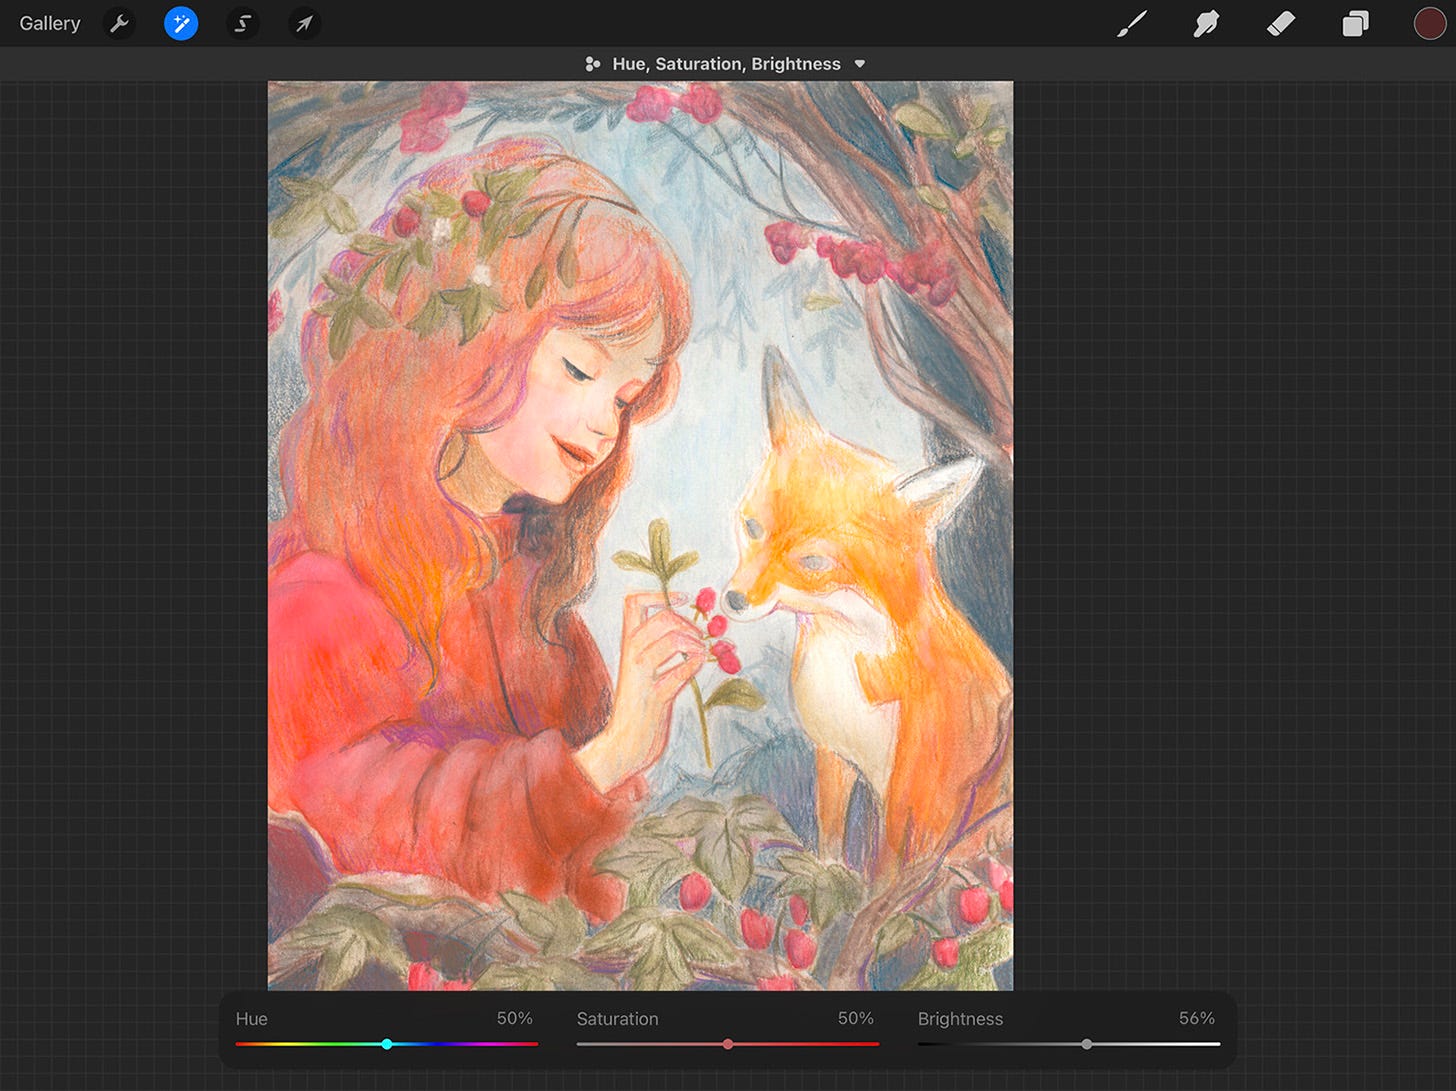
Tap on the Adjustments icon at the top left, and select Hue, Saturation, Brightness.
At the bottom right of your screen, slide the Brightness down to 40% or so. The lower the value, the darker the shadows.
Step 5
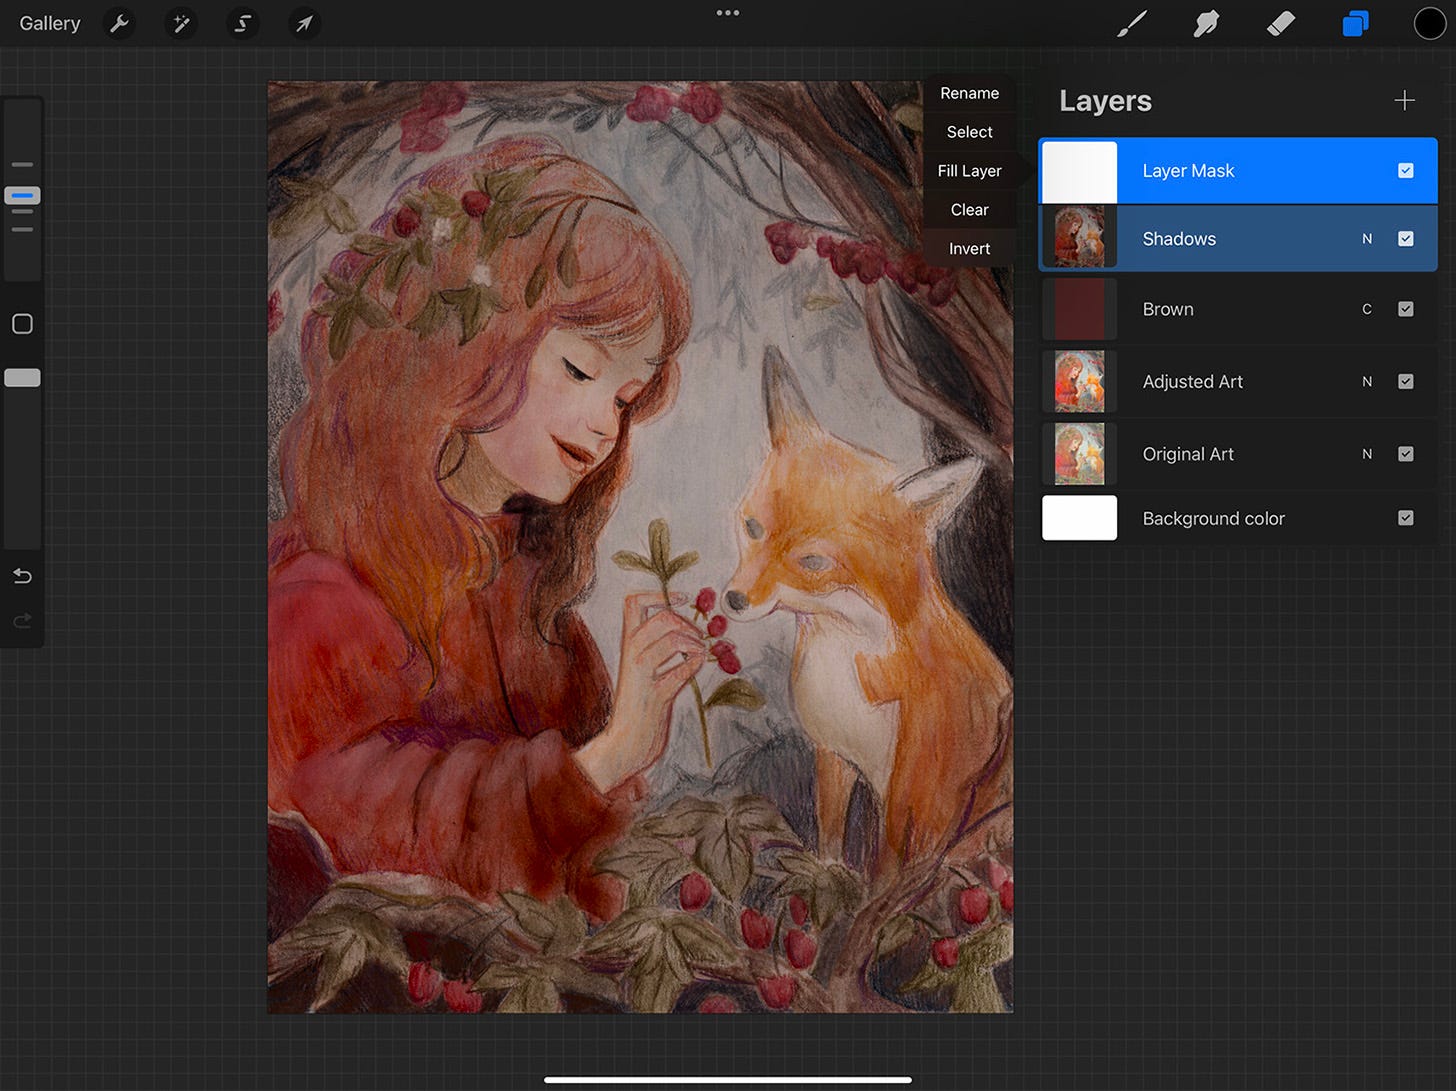
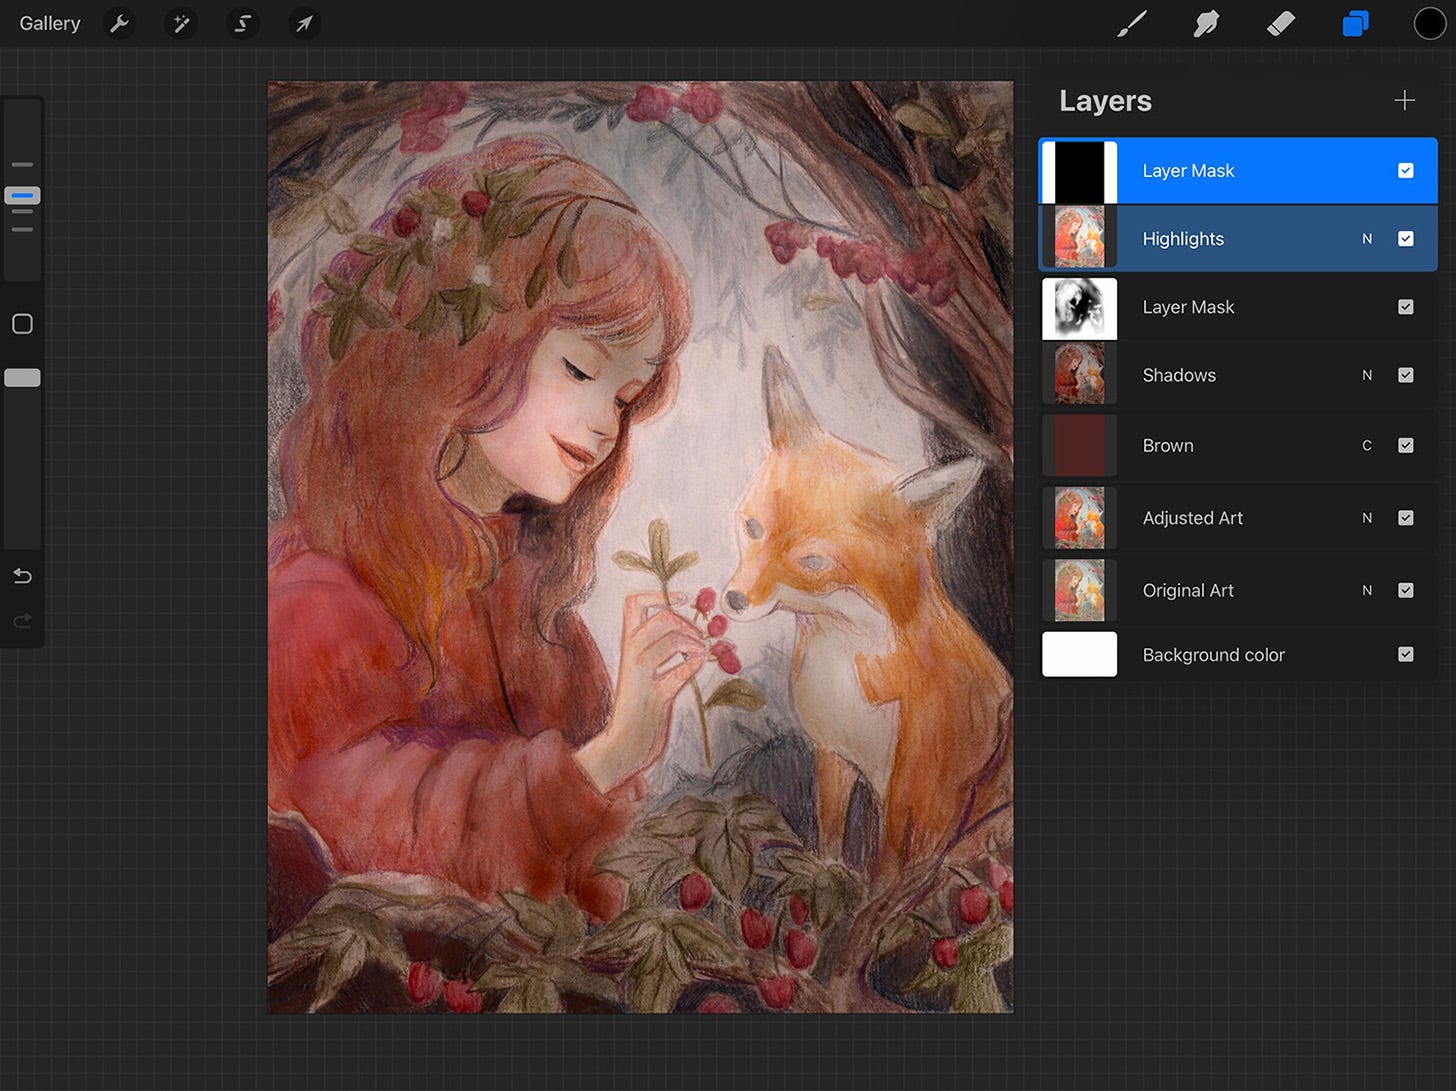
With the Shadows layer selected, tap on the layer to bring up the layer menu. Tap Mask.
Fill the mask with black. A quick way to do this is to tap on the mask and then choose Invert. That will save you a step if black isn’t already selected.
Once the mask is black, the shadow effect will disappear.
Step 6
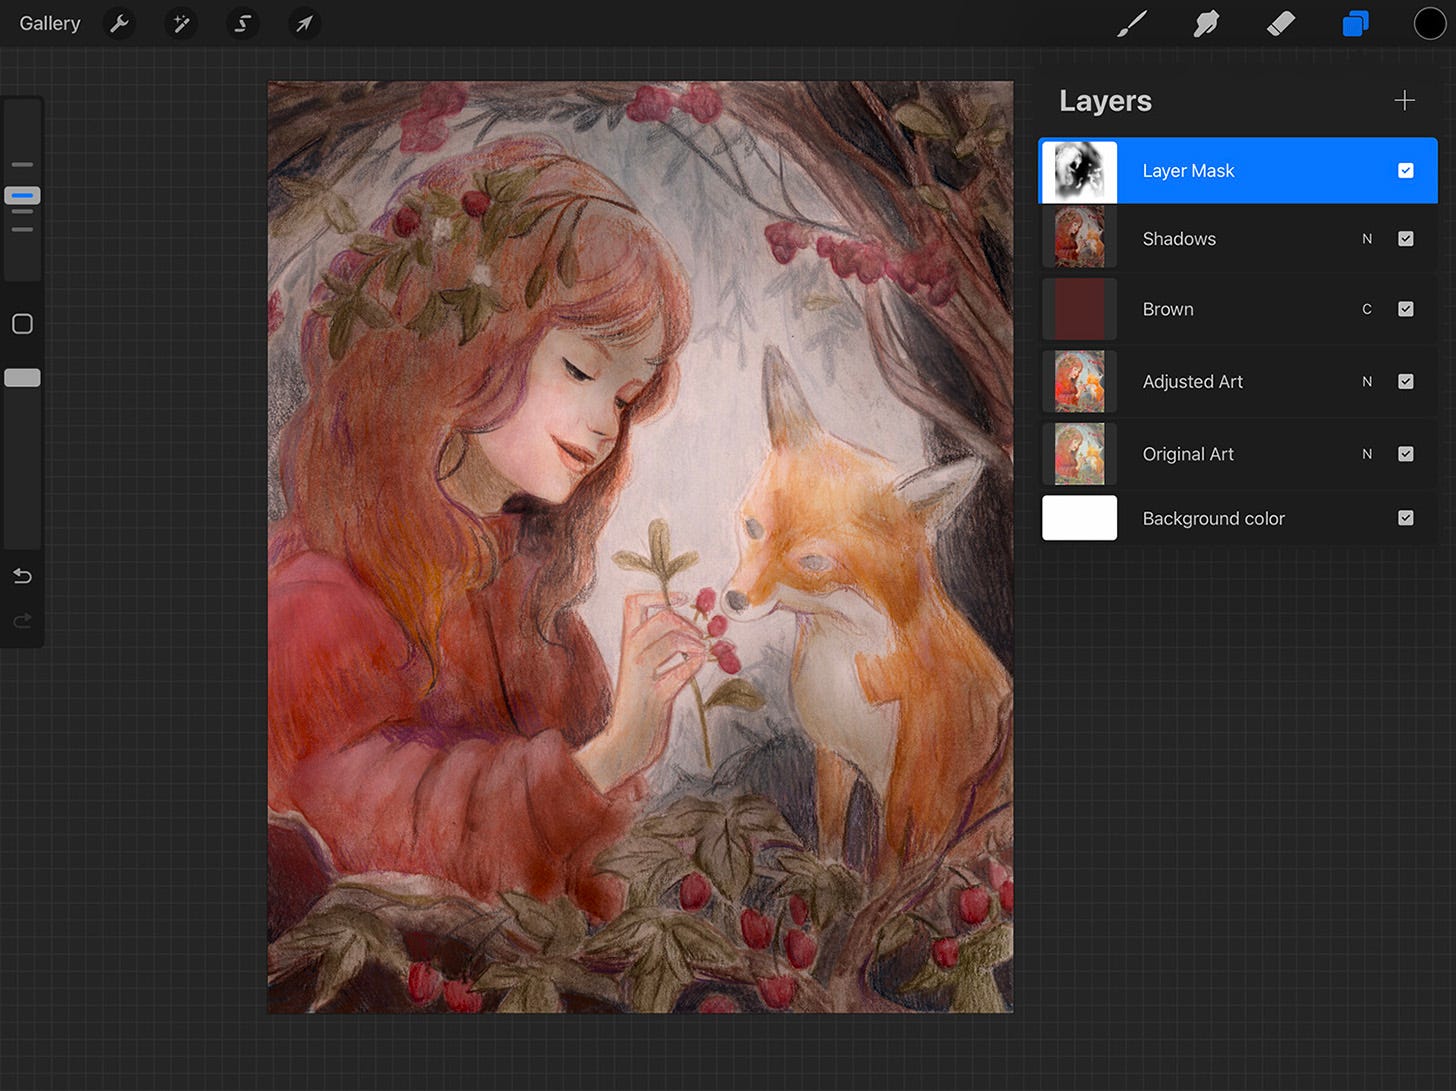
With the mask still selected, use your brush to add shadows.
You can be as loose or precise as you like. I often do loose shadows and get more precise with my light layer, but sometimes I’ll do it the other way around.
Step 7
When you’re happy with the shadows, duplicate your Adjusted Art layer, and drag it above your Shadows layer.
Name this new layer Highlights.
Use Hue, Saturation, Brightness to lighten the layer by dragging the Brightness slider to the right. For this example, I’ve chosen 56%.
Step 8
Add a mask to your Highlights layer and fill it with black so that the highlight effect disappears.
Step 9
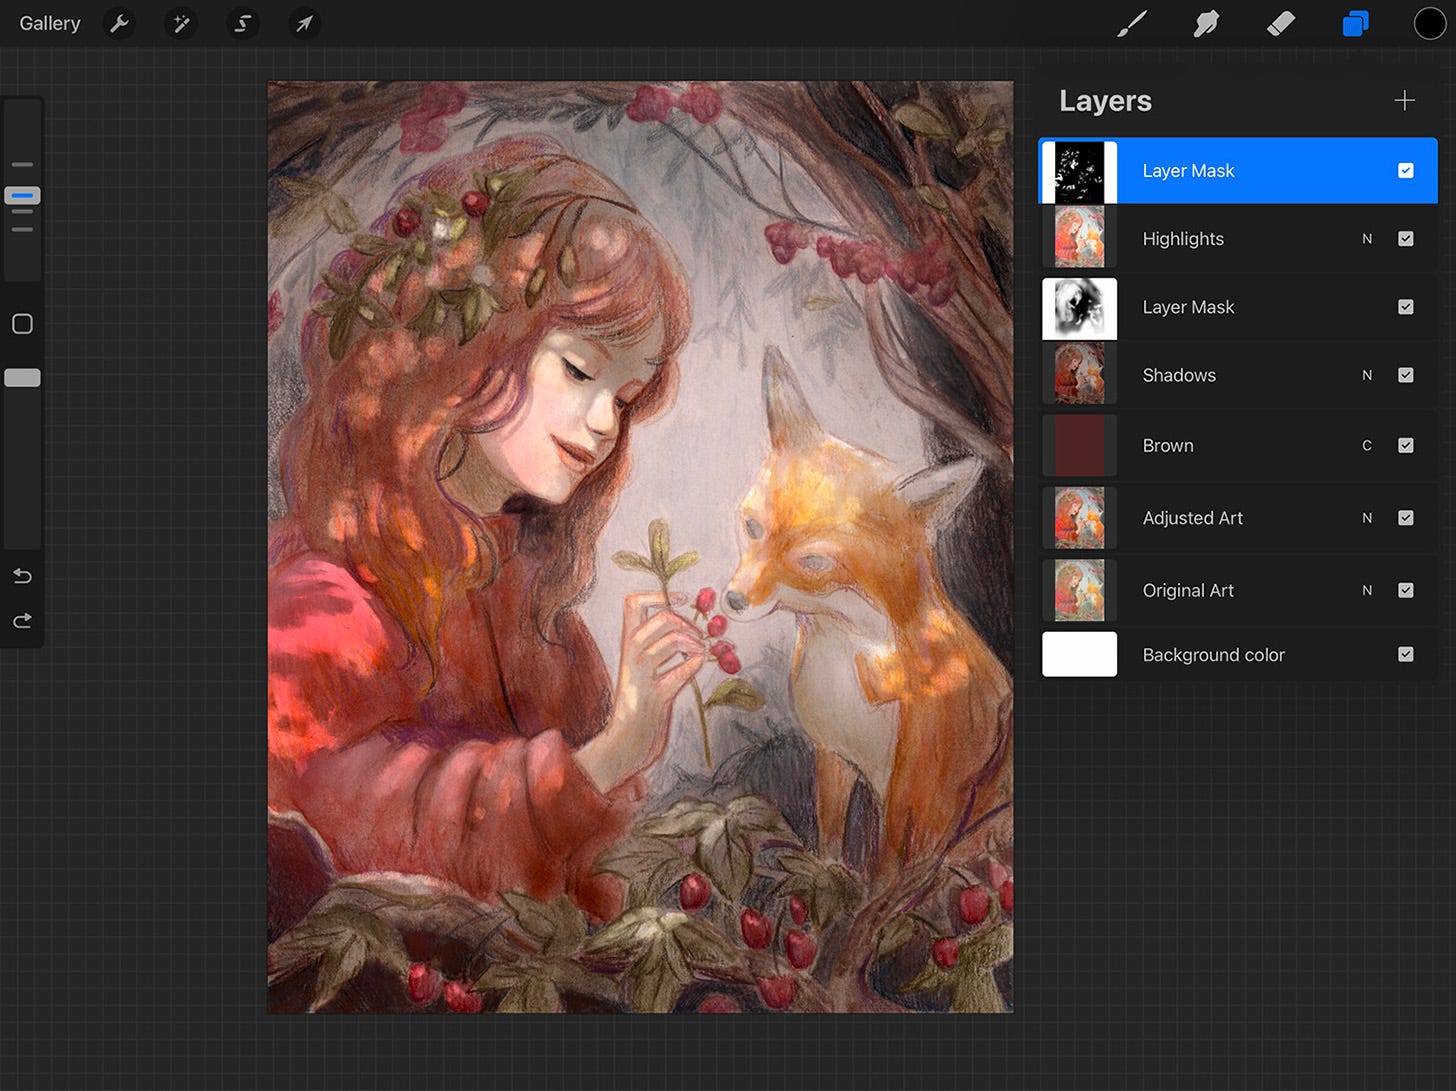
With the Highlights mask selected, use your brush to add highlights.
Step 10 (optional)
Create a new layer and add in any touch ups you might want. That’s it!
Have fun and let me know if you try out this technique!
If you found this helpful, please consider sharing it with others!


Thanks Jennifer that’s really generous- I’m excited to give it a go xx
Incredibly helpful Jennifer, thank you so much! I got 6 images in the email before the link to see the full article. Using outlook on an iPhone, I guess it might vary